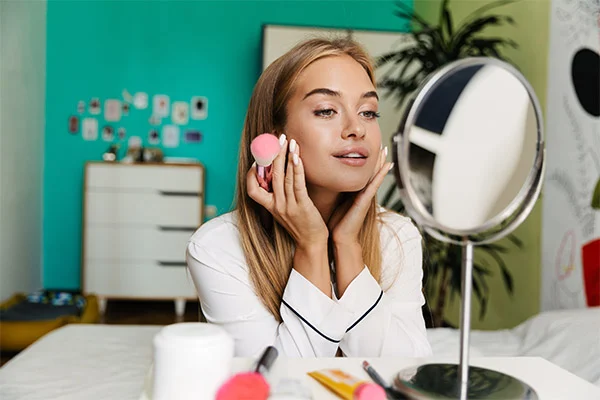
10 Must-Watch Makeup Tutorials for Beginners (No Skills Required!)
Best YouTube Makeup Tutorials for Beginners Applying makeup is an art. But every great artist comes from humble beginnings. If you’re just getting started with your journey, there are so many great makeup tutorials on YouTube from pros and beauty enthusiasts alike that can help you apply products with confidence. Today, we’re going to share the top 10 makeup tutorials for beginners from loved and trusted YouTubers. Top 10 Makeup Tutorials for Beginners 1. How to Apply Makeup for Beginners – Eman How to Apply Makeup for Beginners (STEP BY STEP) | Eman Need a step-by-step tutorial on how to apply makeup? Eman has you covered. What to do before you start applying makeup How to apply primer Applying foundation and concealer Choosing and applying powder Applying blush and bronzer Defining and filling your brows Applying mascara Adding highlighter Applying lipstick Using setting spray In the description, you can also find a list of all the products used in the tutorial, so it’s super easy to follow. makeup svg Facebook Pinterest TIP: If you’re crafty, you can create your own cute makeup bag with a Cricut and a few supplies! 2. Quick 5 Minute Makeup Tutorial – Stephanie Bailey QUICK & EASY 5 MINUTE MAKEUP TUTORIAL! If you’re looking for quick and simple makeup tutorials for beginners, Stephanie Bailey’s 5-minute makeup look is a great option. If you don’t have a lot of time in the morning, this tutorial is for you. Plus, she gives other great tips on how to get out the door faster. Foundation for a solid base Concealer to hide your blemishes, brighten up your undereyes and highlight Powder to your oily spots Eyebrow makeup for more defined and fuller brows Mascara for fuller, more voluminous lashes Bronzer and blush in a natural way Lipstick for a quick pop of color or to highlight your natural lip color Stephanie’s down-to-earth attitude and helpful tips make this an excellent tutorial for beginners who want to put more effort into their makeup, but are pressed for time. She’s not a professional makeup artist – just a girl who loves makeup and sharing her tips. TIP: Make labels for your makeup storage and bags to keep things organized! 3. Beginners Eye Makeup Tutorial – TheMakeupChair Beginners Eye Makeup Tutorial | Parts of the Eye | How To Apply Eyeshadow Maybe you’re a beginner who wants to focus on specific parts of the makeup process. Eyes are a great place to start, and TheMakeupChair’s tutorial is perfect for newbies. In this tutorial, you’ll see: How to apply concealer and primer before getting started Which blending brushes and eyeshadow colors to use The best way to apply eyeshadow How to blend Brush techniques The voice behind TheMakeupChair is Sinead from Cork, Ireland. Sinead has lots of tutorials on makeup and product reviews. She’s been making videos since 2010 and has a huge following. Her detailed and methodical approach to applying eye makeup makes this tutorial so educational and fun to follow. 4. Beginner Makeup Starter Kit – Slim Reshae BEGINNER MAKEUP STARTER KIT | ONLY 5 DRUGSTORE PRODUCTS! Sometimes you just need a good tutorial on what products you should get as a beginner. Makeup is fun, but it can quickly get expensive. With so many products and options out there, it’s helpful to have some tips and advice on where to start. Slim Reshae’s tutorial will show you which five drug-store products you need to get started with your makeup kit, including: Mascara Contour/eyeshadow palette Concealer Setting powder Foundation Slim demonstrates how she creates a beautiful, everyday and natural look using just these five products. Her tutorial is easy to follow, and she really goes into detail on how to apply each product. If you’re a beginner who needs help finding affordable products, Slim’s tutorial is for you. Related: 20 Makeup Instagram Stickers to Off Your New Look 5. Makeup Mistakes to Avoid – Christen Dominique Makeup Mistakes To Avoid – Do’s & Don’ts If you’re just getting started with your makeup journey, it’s easy to commit a few faux pas. With Christen Dominque’s tutorial, you can skip the mistakes, and learn how to apply your makeup like a pro. How to choose the right foundation color, and which colors to avoid How to choose concealer, and why brighter isn’t always better When and how to apply powder The right and wrong way to apply bronzer and blush How to create a natural brow and what not to do when working on your brows Mistakes to avoid when applying eyeshadow and eyeliner The right way to use false eyelashes Mistakes to avoid when doing your lip color She goes into detail about why you should avoid these mistakes and how to fix them, which makes this a great tutorial for frustrated beginners who need help improving their technique. Christen Dominique is a beauty influencer and she has her own line of cosmetics, so she knows what she’s doing. 6. Simple Glam Makeup – Denitslava Makeup SIMPLE GLAM Makeup Tutorial If you’re looking for a beginner-friendly glam makeup tutorial,Glam makeup can be tricky, even for more experienced makeup users. In this tutorial, you’ll follow along as Denitslava applies: Foundation and concealer Brow filler and concealer Primer to her eyes Eyeshadow Cat eyeliner Bronzer and blush Highlighter Mascara Lip color She makes it so easy to create a simple but gorgeous glam look that’s great for date nights, weddings or other formal events 7. How to Match Foundation to Your Skin Tone HOW TO MATCH DRUGSTORE FOUNDATION TO YOUR SKIN TONE | Slim Reshae Choosing the right foundation shade is crucial if you want to create a natural, flawless look. But finding the perfect shade for your skin tone can be tricky, especially if you’re a beginner. This is another tutorial from Slim Reshae on how beginners can find the right color foundation. She explains: How to find swatches, so you can test out tones Other tools you can use to find a good color match Things to keep in mind if you get help at beauty stores What not to do when choosing colors If you’re a newbie who is struggling to find that perfect foundation color, this tutorial is for you. 8. No Foundation Makeup Routine – Tea Renee NO FOUNDATION Makeup Routine | Easy and Glowy Everyday Makeup What if you want to start a makeup routine, but you don’t want to use foundation? You may already have flawless skin, or you just don’t like the cakey feeling of foundation. Tea Renee’s tutorial will help you create a photo-worthy, everyday look without foundation. While this tutorial doesn’t use foundation, it does use concealer to hide blemishes and even out your skin tone. Tea shares tips on applying concealer, blending, contouring, highlighting and more. Tea’s look is natural, dewy and beautiful. If you don’t want to wear too much makeup but still want to brighten your eyes and hide a few blemishes this is the tutorial for you. 9. Easy 5 Minute Smokey Eye Trick – Smitha Deepak TRY THIS!! Easy 5 Minute Smokey Eye Trick Need a beginner-friendly smokey eye tutorial? Beauty influencer Smitha Deepak explains how to achieve this glam look in just five minutes. Watch and follow as she walks you through every step of creating a sultry, smokey eye look. Close-up shots of her eyes make it so easy to see what she’s doing and recreate these steps at home. She also covers how to put on false lashes the right way. If you’re looking for an easy date-night look or are heading out for a night on the town, this smokey-eye tutorial will get you glam-ready. 10. Makeup Tips for Beginners – Aja Dang 10 Makeup Tips for Beginners – Easy Makeup Hacks | Aja Dang Aja Dang walks you through some of her top makeup hacks for beginners. You’ll learn: How to find your brow’s natural shape and enhance it Which household tools can help you create a flawless look How to apply false eyelashes Different ways to apply foundation and concealer How to find your contour lines Aja’s tips and tricks can take your beginner routine to the next level. While she’s not a professional makeup artist, she is an influencer who has her own clothing line and really focuses on self-love.
READ MORE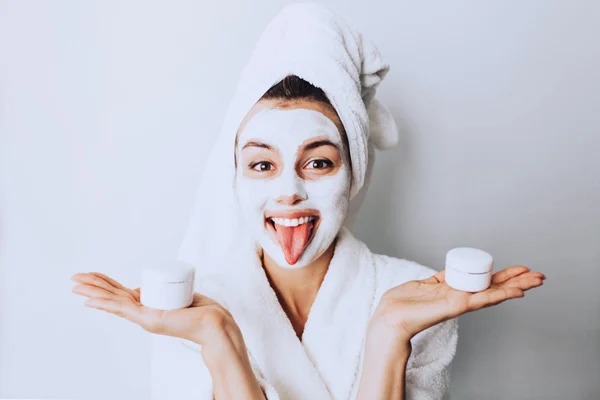
Can You REALLY Use Paula’s Choice BHA Everyday? Here Is What You Need to Know
Paula’s Choice Paula’s Choice BHA has won countless beauty awards and a cult-favorite for years. Whether you’re battling breakouts or signs of aging, BHA can help improve the look and feel of your skin. But can you use Paula’s Choice BHA everyday? Most people have been told that exfoliants should only be used a few times a week. Is Paula’s Choice BHA different? Can it really be a part of your daily skincare routine? Let’s take a closer look at the ingredients in this product and how to use it. Spa-Inspired Wall Decor for Your Home Paula’s Choice BHA Ingredients Can You Use Paula's Choice BHA Everyday Paula’s Choice is very transparent about their ingredients, and they also explain the purpose of each ingredient to help you understand what you’re applying and its effects. Water: The first ingredient on the list, which means it has the highest concentration of all ingredients. It helps moisturize the skin and improve absorption of other ingredients. Methylpropanediol: An ingredient that helps improve absorption of other components in the product. Butylene Glycol: A humectant that boosts hydration and helps smooth the skin. Salicylic Acid: Also known as BHA, or beta hydroxy acid. BHA exfoliates the skin by dissolving the bonds that prevent dead skin cells from shedding. Because this ingredient is oil soluble, it can penetrate and exfoliate the pores. That’s why BHA can be so effective at reducing blackheads and whiteheads. Polysorbate 20: A mild cleansing agent that’s derived from lauric acid (coconut-based). Camellia Oleifera Leaf Extract: Rich in antioxidants and has soothing effects. Sodium Hydroxide: Also known as lye, this ingredient helps maintain the product’s pH. It’s a common ingredient in cosmetic products. Tetrasodium EDTA: A chelating ingredient that helps prevent metals and minerals from bonding to other ingredients. This ingredient is considered a good stabilizer. As you can see, Paula’s Choice BHA contains a good mix of hydrating ingredients in addition to its exfoliating star ingredient – salicylic acid. What Does BHA Do For Your Skin? BHA is considered a chemical exfoliant, and its primary purpose is to remove dead skin cells from the surface of your skin. Many exfoliating products are physical exfoliants, which means that they physically slough away dead skin cells. A sugar scrub is an excellent example of a physical exfoliant. BHA works on a chemical level to remove dead skin by dissolving the bonds that make them stick to your skin’s surface. While this may seem like a harsh process, it isn’t. In addition, BHA has anti-inflammatory properties that help soothe your skin as you exfoliate. On a more technical level, BHA works its magic on the top layers of your skin by lifting dead skin cells away to reveal the youthful, radiant skin underneath. BHA can: Penetrate the pores and exfoliate its linings Help unclog pores Help reduce pore size Because of its hydrating, soothing and exfoliating properties, BHA can help with: Clogged pores Enlarged pores Fine lines and wrinkles Breakouts Many people assume that scrubs and physical exfoliants are the gentler option, but the truth is that chemical exfoliants like BHA are gentler and kinder to the skin. How To Apply Paula’s Choice BHA The great thing about Paula’s Choice BHA is that it’s so easy to apply. It takes just seconds to exfoliate your skin. Here’s what to do: First, make sure that you cleanse and tone. These two steps will make it easier for your skin to absorb the product. Apply Paula’s Choice BHA using either a cotton pad or your fingers. Do not rinse. Follow the rest of your skincare routine. For daytime use, make sure that you’re applying sunscreen with an SPF 30 or higher. You can apply this product all over your face, or in trouble areas. How Much Paula’s Choice BHA to Use One big question people have about BHA is how much is too much? How much should you be applying when using this product? A little goes a long way with Paula’s Choice BHA. It has a liquid consistency, so you won’t need much to cover your face. Fortunately, the product comes out in drops, so it’s easy to experiment with different amounts to see how much you need. You only need enough for a thin coating, so be conservative at first. How Long Does Paula’s Choice BHA Take to Work? Chemical exfoliants get right to work getting rid of dead skin cells, but it can still take some time to see noticeable results. According to Paula’s Choice, results can take: 1-3 weeks, depending on how frequently you apply the product Of course, you’ll need to continue using the product to maintain your results. Some people see results faster, but generally, you’ll need to use this product for at least a few weeks before you notice any changes. If you use Niacinamide, can you use Paula’s Choice BHA everyday? Let’s find out. Can I Use Paula’s Choice BHA with Niacinamide? Niacinamide, or vitamin B3, is a popular skincare ingredient that helps with hydration and skin brightening. Many people wonder whether BHA and niacinamide can be used together to help unclog pores and even out their skin tone. But is it okay to pair these ingredients, or will they be too harsh for your skin? Yes, you can use BHA and niacinamide together. In fact, Paula’s Choice sells a BHA and niacinamide duo. However, the company does caution that if you have sensitive skin, you may need to alternate these products by using one in the morning and one in the evening. How to Turn Your Next Shower into a Luxurious Spa Experience? 10 Best Makeup & Cosmetics Websites Do You Moisturize After Paula’s Choice BHA? If you’ve never used a chemical exfoliant like BHA, you may not know whether it’s okay to apply moisturizer afterward. After all, chemical exfoliants take some time to work. Won’t moisturizers and other products affect their efficacy? Not necessarily. Paula’s Choice recommends applying BHA after you’ve cleansed and toned your skin. Once you’ve applied your exfoliant, you should apply the rest of the products in your routine (serums, moisturizers, etc.) in the order of their texture – from thinnest to thickest. The company states that you do not need to wait to apply your moisturizer either. The BHA will work its magic even after you apply other products to your skin. Can I Use Paula’s Choice BHA Exfoliant Every Day? Yes, you can apply BHA every day. It’s easy to incorporate this product into your daily skincare routine. However, Paula’s Choice recommends starting off slowly when using this product for the first time. Initially, you should only be applying BHA every other day. Then, over time, you can increase your use to twice per day (morning and evening). Many people find that applying it just once per day is enough to keep their skin looking radiant and youthful. Paula’s Choice BHA Liquid Vs Gel If it’s in liquid or gel form, can you use Paula’s Choice BHA everyday? Yes, but there are a few things to consider when making your choice. The Skin Perfecting 2% BHA liquid is Paula’s Choice’s most famous and popular BHA product, but they also offer a BHA gel product. In fact, the brand has a number of different types of BHA products to help you meet your needs, including lotions. But what’s the difference between the two, and which one is best for you? BHA liquid is a gentle leave-on exfoliant that’s easy to apply and can be used up to twice daily. BHA gel is a bit easier to apply because of its thicker consistency. Paula’s Choice recommends BHA gel for combination skin. According to the company, their liquid BHA is great for all skin types and especially oily skin. Really, it comes down to personal preference here. The gel variation includes grape seed extract, which gives it a slightly more hydrating effect. Best Online Shops to Buy Paula’s Choice BHA One great thing about Paula’s Choice BHA is that it’s so easy to find online. Of course, you can purchase their BHA products from their official store, but you can find some great deals when you buy from other retailers. Some of the best online shops to buy Paula’s Choice include: Sephora – They carry a wide range of the brand’s products. Amazon – Paula’s Choice has an Amazon store, so you can purchase genuine products and enjoy the convenience of 2-day shipping with Prime. Nordstrom – You can find a variety of BHA products as well as other items from Paula’s Choice. Dermstore – They carry the 4 oz. variation of the BHA liquid product. You can also find people selling Paula’s Choice BHA on Poshmark and eBay. Be careful when buying from online marketplaces like these because you may not receive a genuine product. Make sure that you’re buying from a reputable and official source. Paula’s Choice BHA Liquid Can You Use Paula's Choice BHA Everyday Paula’s Choice BHA liquid has been a fan-favorite for years, and its gentle formula makes it suitable for daily use. And if you find that you need a stronger solution, the brand offers a 4% and 9% concentration for spot treatments and to combat signs of aging. Final Thoughts If you’re looking for a simple way to exfoliate your skin while keeping it hydrated and preventing irritation, Paula’s Choice BHA is a great choice. However, if you’re just getting started with this product and want to give it a try, consider the travel size. It will give you a chance to see whether you like the product before committing to a full-size bottle.
READ MORE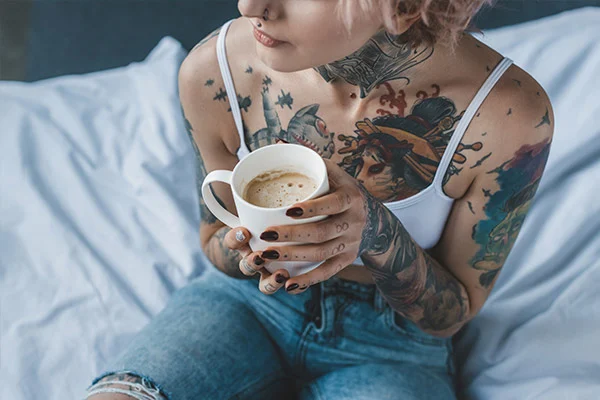
Meaningful Mental Health Tattoos We Love The Most
Mental Health Tattoos and Their Meanings Tattoos are a form of personal expression. For most people, their tattoos are more than just art – they’re reminders or symbols of life experiences. For those battling depression, anxiety, PTSD and other issues, mental health tattoos can be a way to express their feelings and the difficulties they’ve faced. Mental health-related tattoos also bring awareness to this common and important issue. There are so many beautiful and brilliant tattoo designs related to mental health. Here are some of our favorites. Inspiring Mental Health Tattoos With Meaning 2 Tips For Choosing the Right Tattoo Choosing a tattoo isn’t an easy decision. Sure, you can remove a tattoo, but it’s a painful, expensive and tedious process. If you want to get a tattoo that brings awareness to mental health, it’s important to consider a few things. Use these tips to help you choose the right tattoo. Don’t Choose a Trendy Design A trendy tattoo design may look great now, but what about 10+ years from now? Choose a timeless design that will be just as meaningful and beautiful in the decades to come. Get Personal The best tattoos are the ones with personal meaning. Think about your personal experience with mental health and what symbols or phrases speak to you. For example, if you’ve made a lot of progress with your personal growth, a tattoo design that features a watering can and flowers with a simple phrase or quote may be perfect for you. It’s personal, meaningful and symbolic. Choosing a timeless design with personal meaning will help ensure that you don’t regret your tattoo and it continues to serve as a positive reminder to keep moving forward. Show off your tattoo with our Instagram stickers Mental Health Popular Symbols and Their Meanings Many mental health awareness tattoos feature powerful symbols of growth, hope and sometimes, sadness. Here are some of the most popular symbols and their meanings. Green Ribbon A green ribbon is the universal symbol for mental health awareness. There are many ways you can incorporate this ribbon into a tattoo design, like this one: 10 Best Hope Tattoo Designs Lotus Flower The lotus flower is symbolic of the recovery from mental health issues. Lotus flowers grow and thrive in muddy, still water. They root themselves in the muck, and each morning, they rise up through the water and bloom. When the day is through, the flower submerges itself into the river water and repeats the cycle the next morning. For those battling mental health issues, life can feel like the cycle of the lotus flower. It’s a beautiful reminder that each new day is a chance to bloom. 50 Mental Health Tattoos That Raise Awareness Of Depression & Anxiety Growing Flowers For those who are recovering from mental health issues, tattoos of growing flowers can symbolize their own growth. It’s a reminder that we are all constantly learning and improving. The flowers are usually growing out of the figure’s head in the tattoo, drawing attention to the fact that the mind is growing. Growth-related tattoos are often accompanied by hopeful phrases, like “always growing,” or “I’m growing.” Some also incorporate green to symbolize mental health awareness. Serotonin Top 81 Best Serotonin Tattoo Ideas – [2021 Inspiration Guide] The serotonin symbol serves as a reminder to stay calm and happy. Serotonin is an important neurotransmitter that helps regulate your mood and feelings. Having the symbol tattooed on your arm or body can help you stay grounded and calm when times get tough. Some choose just the plain serotonin symbol, while others add on to the symbol by incorporating flowers or some other symbol of growth. Butterfly 16 Tattoos Celebrating Recovery Butterflies go through a great transformation before they become the beautiful creatures they are, which is why they have become an important mental health symbol. As a tattoo, they can serve as symbols of the growth that you’ve achieved or the work ahead. It’s also a gentle reminder that while transformation is painful, it’s worth it. Some tattoos pair butterflies with flowers or quotes to drive the message home. Facebook Pinterest Viral recipes, genius hacks, and beautiful printables, straight to your inbox every week! SUBSCRIBE TO OUR NEWSLETTER Name Email SIGN UP FOR URBANMAMAZ Anchor My struggles may try to sink me but my husband my anchor won’t let me #mental health #semicolon project Anchors can be powerful symbols, especially for mental health. For many, the anchor is someone or something in their life that keeps them grounded or from sinking. Some tattoos feature an anchor tethered to a heart or an anchor with an awareness ribbon wrapped around it. Semicolon Tattoodo The semicolon has become a symbol for hope, a reminder never to give up and a continuation of life. It marks the continuation of your story and, perhaps, a new beginning. The semicolon became a logo for Project Semicolon, which is a non-profit that promotes suicide prevention and mental health wellness. Today, it has become a symbol of solidarity for those battling mental health issues. You can find many beautiful tattoos featuring these punctuation marks. It’s often paired with sunflowers or butterflies to represent growth and transformation. Tattoos For Mental Health Awareness Mental health tattoos don’t always have to incorporate symbols. They can sometimes be direct and obvious. Other times, they subtly hint at the struggles the owner is going through. Here are some of our favorite unique mental health awareness tattoos. Still Have Hope No matter how hard it gets and how low you feel, there is always hope for a better tomorrow and a happier future. This tattoo serves as a reminder of that. The words “Still Have Hope” are powerful, and the crossed fingers are a symbol of hope. Behind the Mask When you suffer from anxiety or depression, it can feel like you’re wearing a mask. You show the world you’re happy, smiling face, but inside, you’re struggling to make it through the day. This tattoo embodies that feeling. The girl wears a tiger mask in front of the mirror, but behind it, she’s crying. The tattoo has a powerful meaning and really sheds light on the struggles people with depression and anxiety face every day. No Doubt Many mental health issues can lead to self-doubt and lack of confidence. This tattoo serves as a reminder not to let doubt get in the way of your dreams or your journey. The “ubt” in the word “doubt” is crossed out to remind you that you should “do” what makes you happy. Walking a Tightrope When you have anxiety, depression or other mental health issues, it can feel like you’re walking a tightrope. This tattoo is the embodiment of that feeling. A person is walking a tightrope between two clouds, using a stick to maintain balance. Mental Health Self Love Tattoos Many people struggle with self-love and confidence. Social media, filters and impossible beauty standards make it challenging for everyone to feel confident in their own skin. These tattoo designs remind us all to love ourselves. Love Yourself First While this tattoo is simple, it has a powerful and beautiful message: love yourself first. After all, you can’t love others if you don’t love yourself first. The simple scripted text is beautiful and minimal, so it can easily be placed virtually anywhere on the body. Self-Hug Self-love tattoos don’t have to be elaborate or detailed to be meaningful and beautiful. This tattoo features a person hugging themselves with the simple words “love yourself.” Imperfect and Worthy Sometimes, we need a reminder that no one is perfect, but that doesn’t make them unworthy. This beautiful tattoo design features a woman hugging herself with flowers growing from the top of her body. Beneath it are the words “I am imperfect and still worthy.” A fitting reminder to love yourself and all of your so-called flaws. I Am Enough Self-love also means reminding yourself that you are enough no matter what. This beautiful tattoo features the words “I am enough” with a bouquet of flowers. I Still Rise Motivational words can help you work on your self-love and remind yourself how far you’ve come. This minimalistic tattoo features the words “And I still rise” below a rising sun. Each day is another opportunity to rise, shine and learn to love yourself. To Err is Human When you love yourself, you forgive yourself. We’re all humans, and we all make mistakes. This tattoo design is an important reminder of this. “To err is human, to forgive, divine.” These are powerful words that can help you stay grounded when negative thoughts creep in. Love Yourself Featuring butterflies and a self-hug, this tattoo reminds you to “love yourself.” This tattoo design represents not only self-love, but personal growth. It’s another example of how beautiful fine-line tattoos can be, especially for mental health awareness themes. Phoenix A phoenix symbolizes rising from the ashes and starting anew. It’s a powerful reminder of resilience, strength, and the ability to rebuild after difficult times. For many, this tattoo reflects their journey through mental health struggles and their determination to keep moving forward, no matter how hard it gets. Sun and Moon The sun and moon together represent the balance between light and dark. Life is full of highs and lows, and this tattoo is a reminder to accept and find peace in both. It’s a comforting way to symbolize the need for harmony and self-acceptance, even when facing challenges. Feather A feather represents lightness, freedom, and letting go of burdens. It’s a great choice for those who’ve overcome mental health struggles and want a daily reminder of their progress. The feather can also symbolize hope, as it’s often seen floating gently through the air, moving forward without resistance. Mountain Range Mountains are symbols of strength, perseverance, and achieving goals. This tattoo can represent the challenges you’ve faced and the strength you’ve found to climb higher. It’s also a reminder that while the journey might be tough, the view from the top makes it all worthwhile. Wave A wave tattoo is a symbol of life’s ups and downs. It’s a reminder that even in rough waters, you have the strength to keep moving forward. For many, this design reflects their resilience and the idea that life, like the ocean, is always in motion. Open Cage An open birdcage symbolizes freedom and breaking free from struggles. It’s a visual reminder of the progress you’ve made and the mental barriers you’ve overcome. Some people choose to include a bird flying away, emphasizing their journey toward peace and liberation. In Omnia Paratus “In Omnia Paratus” means “Ready For All Things”. This quote, paired with an umbrella design, represents protection and staying strong through life’s storms. It’s a comforting symbol of resilience, reminding you that you can weather even the toughest challenges. Sunflower Sunflowers are known for always turning toward the light, making them a symbol of hope and positivity. This tattoo can remind you to focus on brighter days and keep growing, even in difficult situations. The sunflower’s vibrant energy is a beautiful representation of resilience and optimism. Puzzle Piece A puzzle piece often symbolizes individuality and mental health awareness. It can represent the unique struggles you face and the important role you play in the bigger picture of life. Many people choose this design as a way to honor their mental health journey and their progress toward self-acceptance. Heartbeat Line A heartbeat line tattoo is a symbol of life, perseverance, and the strength to keep going. It’s a simple but meaningful way to honor your journey and the progress you’ve made. Some people add words like “stay strong” or incorporate symbols like hearts to make the design even more personal. Final Thoughts Mental Health tattoos help bring awareness to issues that many of us are battling but have trouble talking about. They also serve as symbols and powerful reminders of the journeys we’re on and how far we’ve come. If you’re considering getting a mental health tattoo, use these designs as inspiration.
READ MORE
Love Vintage? Here are 18 Hottest Vintage Hairstyles That Are Always Trendy
to vintage styles of the 50s. Her victory roll ponytail is one of her most iconic looks, and it’s one that you can easily pull off at home. And if you don’t have long hair – don’t worry. You can still rock this look if you have some clip-in extensions. Here’s a great tutorial that will show you how to create this look at home. Just make sure that you curl your ponytail, too! 17. Faux Bob The bob is a vintage hairstyle that’s come back in style in recent years. It’s a flattering cut for any face shape, and it’s a low-maintenance style that works well for any occasion. But what if you want the look of a bob without committing to a haircut? You can create a faux bob in just a few steps. All you need is a curling iron, some great twisting skills and a few pins. Follow the steps above to rock a bob at your next event. 18. Low Roll Here’s another simple yet elegant vintage hairstyle that’s so easy to recreate at home, especially if you have the classic vintage roll kit from Conair. Just tuck the hair around the hair piece, pin it to keep it in place (you may need a lot of pins), and walk out the door. The classic hair roll style is perfect for any occasion and can easily be dressed up or down. Final Thoughts These vintage hairstyles are easy to do at home and can be worn for any event or even to work. For most of these styles, you’ll need a curling iron and some bobby pins – that’s it! Use the tutorials to walk you through each step, and don’t be afraid to experiment with different looks to see what you like best.
READ MORE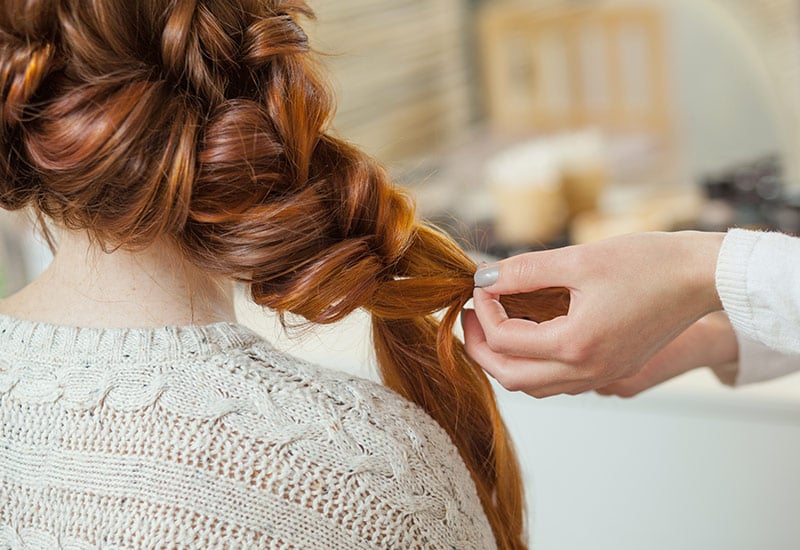
15 Gorgeous Cowboy Copper Hair Ideas for Women
The rustic redhead is a striking cowboy copper style that blends fiery copper tones with hints of red. This look is all about making a bold statement with vibrant, head-turning hair. Great for both long or shorter length, you will sure get some eyes on you with this stunning look! Styling Tip: Enhance the intensity of your color with a color-protecting shampoo and conditioner. Use a curling iron to add waves for added dimension. 2. Sun-Kissed Copper: Natural and Radiant Sun-kissed copper hair reflects the glow of a desert sunset. This natural and radiant look is perfect for those who want a coppery touch with a subtle shimmer. This style is great if you’re looking for more depth and dimension instead of a solid copper look. You can really see how gorgeous this color looks once you add some waves to it. Styling Tip: Use a lightweight oil or serum to add shine and maintain the sun-kissed effect. 3. Wild West Waves: Free-Spirited and Untamed Wild West waves capture the spirit of the open plains with their free-spirited and untamed appearance. This look exudes a sense of adventure and authenticity. Just because it’s Wild Wet doesn’t mean you can’t incorporate beach waves into it. We’re are here to break some rules after all! Styling Tip: Create loose waves with a large-barrel curling iron, and embrace the effortless, wind-swept look. 4. Cowboy Hat Copper: Rugged Elegance Cowboy hat copper hair pays homage to the Wild West’s rugged elegance. It features a coppery base with slightly darker undertones that create depth and character. This style infuses warm hues of rich copper with nuanced shades of brown, creating a luscious and dynamic mane that’s both daring and sophisticated. Styling Tip: Use a wide-brimmed hat to enhance the cowboy theme and protect your hair from the sun’s rays. Related: 15 Ponytail Hairstyles for a Stunning Look 5. Bronzed Balayage: Subtle Shimmer The bronzed balayage is a subtle cowboy copper style that adds a shimmering effect to your hair. It mimics the play of light on a bronzed cowboy belt buckle. Balayage is just another great way to add more color to your hair, which then adds more depth and dimension, no matter how you style your hair on any given day. Add waves or wear it straight, it will look stunning on any occasion. Styling Tip: Keep the shimmer alive by using a glossing or shine-enhancing treatment. 6. Fiery Copper Ringlets: Elegance in Motion Fiery copper ringlets exude elegance in motion. The tight, bouncy curls showcase the mesmerizing dance of copper hues. Copper is already a gorgeous color on itself, but if you want to take up a notch, wear it with tight curls. Some say this style is not trendy right now, but I beg to differ! If you already have curly hair then you’re already ahead of the curve, but even with straight hair, just make sure you protect your hair against the heat before achieve those magical curls. Styling Tip: Use a curl-enhancing product and a small-barrel curling iron to create defined ringlets. 7. Sunset Ombre: Horizon-Inspired Beauty The sunset ombre is inspired by the breathtaking colors of a desert sunset. It transitions from dark copper at the roots to a blazing orange at the tips. Ombre has been a favorite style for a few years now, and it’s amazing all the different colors you can play with if you dare. Copper is one of them, and if you want to be your bold self, you can’t go wrong with this shade! Styling Tip: Maintain the vibrancy of the ombre with a color-protecting shampoo, and consider using a heat protectant when styling. 8. Desert Rose Gold: A Touch of Glamour Desert rose gold adds a touch of glamour to cowboy copper hair. This unique blend combines the allure of rose gold with the richness of copper. If you have not experimented with rose gold on your hair, be ready to be pleasantly surprised. Rose gold is definitely a color that can be addicting, and it’s not very hard to maintain, given the right products. Add the boldness of red and copper and you are ready to shine! Styling Tip: Use a rose gold tinted hair gloss to maintain the subtle rose gold effect. Related: 15+ Chocolate Copper Hair Trends to Get Inspired 9. Barrel Curls: Vintage Charm Barrel curls are reminiscent of the hairstyles worn by vintage cowgirls. This cowboy copper style exudes timeless charm. Anything can be trendy if you know how to wear it. This also goes for barrel curls, which some people think is a thing of the past. You can prove everyone wrong however, because barrel curls can be done in a very elegant way, and the trick is to wear them loose instead of tight! Styling Tip: Use hot rollers to achieve classic barrel curls, and finish with a holding spray for longevity. 10. Rustic Rust Roots: Earthy and Raw Rustic rust roots add an earthy and raw element to cowboy copper hair. The contrast between copper lengths and rusty roots creates a captivating rugged look. Another version of Ombre, this can be a stepping stone to a more vibrant color if you’re not ready for all that copper and red have to offer. If you want a subtle, but still feel like you got a makeover, this style might be just what you need! Styling Tip: Embrace the natural growth of your roots, and use a color-protecting product to maintain the vibrancy of the copper. 11. Cowboy Copper Pixie: Short and Sassy The cowboy copper pixie is short, sassy, and full of personality. This low-maintenance style brings a touch of the Wild West to everyday life. If you want to maximize your day and time, a pixie might be for you. It’s trendy, it’s youthful, while also displaying your rebellious side. You can roll out of bed and put on some mascara (optional, of course), and look like a million bucks. Styling Tip: A pixie cut requires minimal styling, making it a convenient and chic choice for those on the go. 12. Country Chic Braids: Laid-Back Elegance Country chic braids combine laid-back elegance with cowboy copper hair. Braids add a touch of rural charm to this fiery look. You can opt for a simple single braid that uses all the hair, or something more intricate like a waterfall braid! This is the perfect style to either dress up or dress down, and the braids are not that complicated to do, if you want to try it yourself! Styling Tip: Create loose, messy braids that complement the rustic theme. 13. Desert Winds Balayage: Effortless Beauty Desert winds balayage captures the effortless beauty of windswept hair. The balayage technique adds subtle copper highlights, reminiscent of the desert breeze. The good news here is that balayage doesn’t add highlights from the roots of your hair, so when it grows out, it doesn’t look like you need to get another expensive touch up. You can actually go a few months as is, which is a win on my book! Styling Tip: Use a texturizing spray to achieve that windswept effect, and keep your hair looking naturally tousled. 14. Rodeo Ripples: Dynamic and Spirited Rodeo ripples evoke the dynamic and spirited nature of a cowboy’s lifestyle. These layered waves create movement and vitality. Add some highlights for more depth or even as a solid color, this style can add an extra umph to your looks, making you feel like the wild and rebellious! Styling Tip: Emphasize the ripples by using a sea salt spray for a textured, voluminous look. Related: 15 Most Stylish Mom Haircut Ideas to Elevate Your Mom Style 15. Cowboy Copper Halo Braid: Western Whimsy The cowboy copper halo braid is a hairstyle that exudes western whimsy. It’s perfect for special occasions and adds a touch of elegance to cowboy copper hair. This is just another look that is perfect for a casual day, or a date night! The best part is that it’s the ideal style to have it in a “messy” way by loosing it up the strands. It looks elegant, vintage, so it never goes out of style! Styling Tip: Use a hair donut or padding to create a voluminous halo braid, and secure it with bobby pins. Five Styling and Beauty Tips for Cowboy Copper Hair: Maintain Vibrancy: Use color-protecting shampoos and conditioners to preserve the intensity of your copper tones. Heat Protection: When using styling tools, always apply a heat protectant to shield your hair from damage. Texture and Volume: Embrace the natural texture of cowboy copper hair by using texturizing sprays and volumizing products. Regular Trims: Keep your hair looking its best by scheduling regular trims to prevent split ends and maintain the shape of your style. Hair Gloss: Use hair gloss treatments to enhance shine and maintain the depth of your cowboy copper tones. Final Thoughts Cowboy Copper Hair is not just about the color; it’s also about the style. From wild west waves that evoke the untamed spirit of the frontier to barrel curls that harken back to the elegance of vintage cowgirls, there’s a Cowboy Copper look to suit every personality. With these practical tips, you should be able to maintain your Cowboy Copper Hair and make sure it shines as bright as a desert sunset. Whether you’re opting for a natural sun-kissed glow or a bold, fiery mane, we’ve got the guidance you need to keep your Cowboy Copper Hair looking flawless.
READ MORE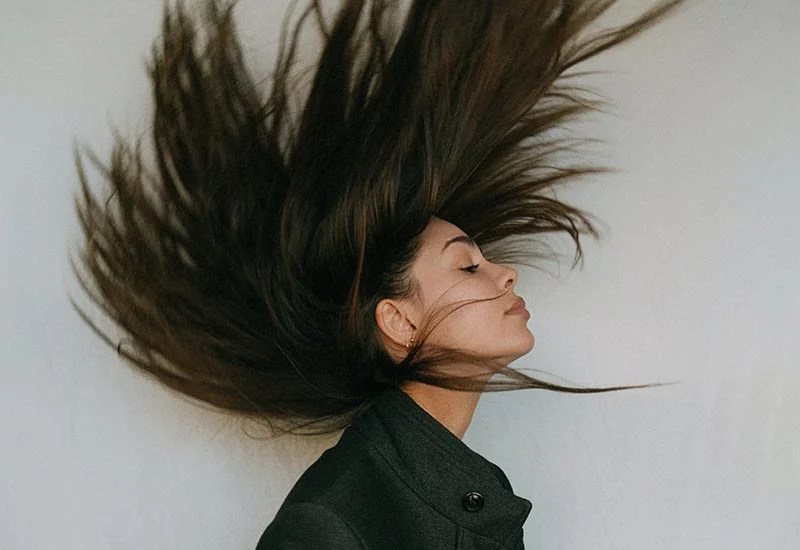
15+ Hottest Goth Hairstyles and YouTube Tutorials
Gothic hairstyles are known for their edgy and dramatic appeal, embracing dark and unconventional aesthetics. These unique hair ideas allow women to express their individuality and make a striking fashion statement. From elegant updos to bold colors, we’ve curated 15+ of the most stylish gothic hair ideas for women, complete with descriptions, styling tips, and links to DIY tutorials. 15+ Goth Hairstyles and YouTube Tutorials That Are Full Of Style 1. The Classic Black Bob: Sleek and Timeless The classic black bob is a gothic icon, exuding a timeless and edgy charm. This sleek and minimalist haircut is perfect for those who prefer a straightforward, yet bold look. All you need is a flat iron to make your hair extra straight and it will be the star of the show. Nothing else is needed here! Styling Tip: Use a flat iron to achieve a super-straight finish, and add a touch of shine serum for that extra gloss. 2. Dark Mermaid Waves: Enigmatic Elegance Dark mermaid waves are a blend of mystery and glamor. These dark, cascading waves bring an enchanting and sophisticated aura to your gothic style. If you already have black (or dark brown) and are looking for an elegant style that doesn’t take too long to achieve, then the mermaid waves are for you! If you don’t want the teasing part of it, you can just use big barrel curling tools and skip teasing. Just think of Jessica Rabbit hair but in black. Yes, we’re bringing goth sexy hair back! Styling Tip: Curl your hair using a large-barrel curling iron, then gently tease the curls for a relaxed, ethereal wave effect. 3. Romantic Victorian Updo: Elegance in Darkness The romantic Victorian updo is a masterpiece of intricate braids, curls, and vintage-inspired elegance. It’s an ideal choice for special occasions or when you want to add a touch of romance to your gothic look. You can have a full up do, or just half, depending on your preference! You can braid just the upper part and leave the bottles with some big waves, or just put everything up as a loose updo! Styling Tip: Braid your hair into two loose braids on the sides before creating the updo for added texture. 4. Fiery Red Locks: Bold and Captivating Goth doesn’t always mean black! Change things up a bit and go bold with a completely different hair color, especially if dying your hair black would require too much work and maintenance. Fiery red hair makes a striking statement in the gothic world. The bold, rich color adds intensity and charisma to your overall look. Styling Tip: Maintain the vibrancy of red hair with color-protecting shampoos and conditioners. 5. Dark and Mysterious Undercut: A Bold Statement The dark and mysterious undercut combines a shaved section with longer hair, creating a bold and unique style. It’s perfect for those who want to stand out. The best part is that you don’t even have to have pitch black hair. A cool color would definitely enhance the goth look, but it doesn’t mean that black is the only choice! Styling Tip: Keep the undercut fresh by scheduling regular touch-ups, and add styling gel for a sleek finish. Related: 15+ Chocolate Copper Hair Trends to Get Inspired 6. Gothic Fishtail Braid: Intricate Elegance The gothic fishtail braid is a captivating and intricate hairstyle that embodies the essence of gothic elegance. All hair colors welcome! Part goth, part viking! Black hair will feel right at home with this style, but lighter hair might see some really cool pattern and dimension when going for this look. Styling Tip: Enhance the depth of the fishtail braid by using a texturizing spray for added grip. Already got the goth look, but want to learn how to do a fishtail braid: Check out this tutorial: 7. Punky Mohawk: Rebel with Style The punky mohawk is a rebellious and stylish choice, featuring a spiky crest of hair down the center. It’s a perfect way to express your individuality. Take this whole thing up a notch and color your hair blue or purple. Afraid of the dramatic change? Fear not, you can start with braiding the sides of your head to see how you like (or love) a potential mohawk! Styling Tip: Use strong-hold hair products to keep the spikes in place and consider adding temporary hair color for a playful twist. Related: 15 Most Stylish Mom Haircut Ideas to Elevate Your Mom Style 8. Velvet Ribbons: Victorian Accessory We’re not completely done with the Victorian style. It’s not just about the hair, but the accessories as well, and how we can make it pop! Dark velvet ribbons add a touch of Victorian elegance to your gothic hairstyle, because well, velvet! You can go for the oh so royal color which is purple, or whatever shade of it you like best! Lets showcase your romantic side! Styling Tip: Secure the ribbon at the base of a ponytail or bun for a romantic and timeless flair. 9. Gothic Bun: Simple, But Elegant We can all be honest and embrace our love for all things bun. It’s easy, can be messy or not, and still look stunning. Anyone can do it, with most hair lengths and all sorts of different styles. All colors are welcome. Perfect for a night out, or just running errands before picking up the kiddos from school. If you’re not sure you can pull this off (yes you can), check out this tutorial so you can learn it the easy way! 10. Intricate Gothic Crown Braid: Majestic and Mystical A little goth, a little Victorian. The crown braid is an enchanting hairstyle that radiates an air of mystique and majesty. They look a lot more complicated to accomplish then it actually is to do it. And that’s all we all want: amazing style with little effort! Whether you are busy with kids or just want the extra time in the morning, this crown braid will make you look gorgeous in no time. Styling Tip: Tease the crown braid slightly for added volume and a more romantic and gothic look. 11. Dark Elegance of Long Locks: Gothic Glamour Long, dark, and sleek locks epitomize gothic glamour and elegance, making a bold yet sophisticated statement. Not every style needs to be complicated. If you don’t have straight hair, all you need is a good flat iron (and good heat protectant products) in order to accomplish this. It’s easy to get it done, and easy to maintain until your next wash! Styling Tip: Invest in a high-quality straightener and use a heat-protectant spray to maintain the sleek finish. 12. Mysterious Side-Swept Bangs: Hidden Gaze Mysterious side-swept bangs add an element of mystique by partially concealing your eyes, creating an enticing allure. There are lots of ways you can do this, but the main difference is style and length of hair. Some like it shorter and some like much longer. The longer ones will require a bit of extra spray to hold it all together or they will cover your eyes. Regardless, they are stylish and we’re here for it. Styling Tip: Use a straightener to style the bangs in a gentle sweep to the side, adding to the enigmatic charm. Related: 15 Ponytail Hairstyles for a Stunning Look 13. Dark Purple Hues: Regal and Sultry Dark purple hues are a regal choice for a gothic look. The deep and alluring color adds an air of royalty to your style. There are a couple of ways you can do this: For the blondes out there, all you need is a good quality purple hair color product (if you’re going all over). If you already have dark hair, it’s best to talk to a hair consultant first to see what the process would be for you since color stripping would probably be involved. OR, you can use purple hair clip ons. Temporary, but so effective. Regardless, purple is the color of royalty, so go show the world the queen you are! Styling Tip: Use a sulfate-free purple shampoo to maintain the vibrancy of your purple hair, and consider alternating with black or violet hair colors for added depth and dimension. 14. Sleek Silver Streaks: Futuristic Edge Sleek silver streaks add a futuristic and edgy touch to your gothic style. The contrast of silver against dark hair is captivating, and best of all, silver hair is totally IN. Either clip some hair extensions for an easy and temporary look, or talk to your hairstylist for the best way to get your silver locks on! Styling Tip: Regularly use a color-preserving shampoo and conditioner for silver hair to keep your streaks looking vibrant. 15. Blood-Red Ombre: Dark Romance Blood-red ombre is a combination of dark and deep red shades that evoke a sense of dark romance and intensity. You can do the traditional ombre that changes color towards the end of your hair, or you can really go all out and do the ombre on your roots! Whatever transformation you feel ready for, this look will sure to get heads turning wherever you go! Styling Tip: Maintain the ombre by using color-protecting products to prevent fading and keep the transition smooth. Final Thoughts Gothic hairstyles provide an opportunity to express your unique style. Whether you prefer sleek black bobs, fiery red locks, or intricate braids, these stylish gothic hair ideas are sure to make a captivating statement. So, embrace the dark side of fashion and create a mesmerizing look that’s truly your own.
READ MORE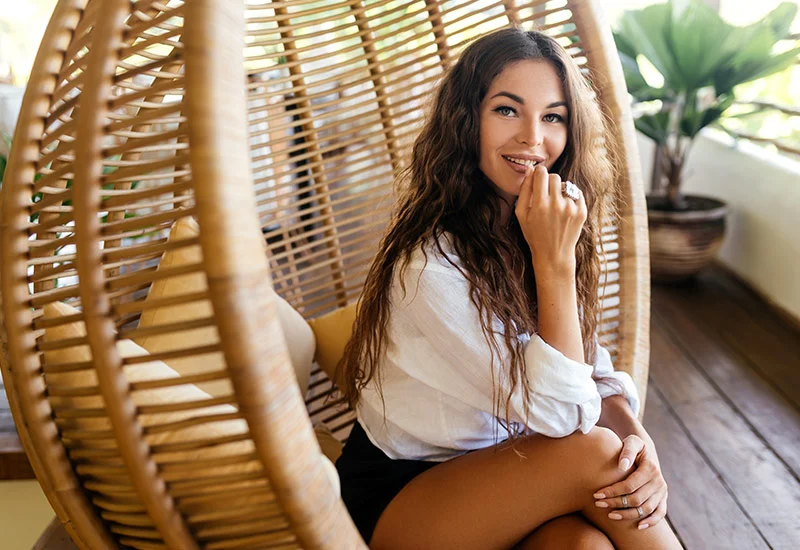
15 Most Stylish Mom Haircut Ideas to Elevate Your Mom Style
As a mom, you’re a multitasking superhero, juggling a million responsibilities while making it all look effortless. It’s time to treat yourself to a stylish mom haircut that not only complements your busy lifestyle but also celebrates your individuality. Let’s just stop with the boring cuts that make your hair look outdated, or complicated cuts that you take too many hours to style. WE all love a good messy bun, but that’s not the only “do” in existence! Below, we’ll explore 15 of the most fashionable mom haircut ideas for moms, complete with inspiring Pinterest pins, descriptions, styling tips, DIY tutorials, and links to related products available online. Let’s revamp your mom style and unleash your inner fashionista! 15 Best Haircuts for Moms 1. Pixie Perfection The pixie cut is timeless and versatile, making it an excellent choice for busy moms. It’s low-maintenance and exudes confidence. A little product can add texture and lift, and just because you have short hair does not mean it needs to be boring or lack style. You can rock some pretty awesome short hair looks, and pixie might be one of them. Styling Tip: Enhance the pixie with a subtle side part or swept-back bangs for a chic look. 2. Effortless Bob The bob is a classic mom haircut that’s never out of style. It’s easy to manage and offers endless styling possibilities. A bob can be worn sleek or with some beach waves for a relaxed look. A bob is a short hair with a long hair feel (or vice-versa), which means you get somewhat long hair, but with the short hair low maintenance. Go the extra mile and get a balayage and have that cool hair look you deserve! Styling Tip: Use a flat iron for a polished bob for a date night or a curling wand for beachy waves. 3. Shaggy Layers Want to feel like a rock star without the life on tour? Shaggy layers add texture and movement to your hair, a style that will definitely be the coolest mom at school pick up. Think of Joan Jett and Farrah Fawcett, and know that some of us would have killed for that hair! But don’t think this rebellious looking haircut is only for nostalgia! Taylor Swift and Zendaya have also been sporting the look recently which just proves it’s a classic and for all hair types! This versatile cut can be worn short or long and complements different face shapes. It’s effortlessly stylish. Styling Tip: Embrace the natural texture of your hair for a carefree shaggy look. Related: 15+ Chocolate Copper Hair Trends to Get Inspired 4. Modern Lob The lob (long bob) is a popular choice for moms. It offers the elegance of a longer style while maintaining the ease of a bob. If a traditional bob feels too short, fear not. Just let your stylist know you need more length so you have more hair left to play with different looks of the same hair. Problem solved. Wear ir straight, or with some salt water for some true beach waves. This is another classic that everyone loves. A center part is the trend, but if you want to be adventurous, you can part your hair on the side. Styling Tip: Use a texturizing spray for that “undone” effect. 5. Asymmetrical Cut Asymmetrical haircuts are edgy and chic. They add drama to your look without much effort. We all remember “Kate Plus 8” amazing hair back in the day, and while that specific style might not be in demand, other variations of it have never left. If you’re feeling bold add some bright color to it (like purple) for some cool punk rock look to it. An asymmetrical bob can be paired with bangs or kept sleek. The best way to wear this look is with shorter hair so it’s more visible, unless of course, you are a rule breaker! Styling Tip: Experiment with various parting options for a fresh style. 6. Short and Sassy A short and sassy haircut is perfect for moms who want a low-maintenance yet stylish look. The name can be a little vague and leave room for interpretation. And that’s because the “sassy” part is really what makes you feel like a boss! Short asymmetrical can be sassy, so can pixie, or even a bob. This cut is to bring out your sassy self on a daily basis, so you can show off your look without spending hours getting ready. It’s youthful and exudes confidence. Styling Tip: Use a volumizing mousse to add body to your hair. 7. Curtain Bangs Curtain bangs are a trendy way to frame your face and add a touch of Bohemian charm. It’s a dream come true for anyone who likes to feel like a celebrity on the red carpet (and we all do). And since we’re in the celebrity topic, no one sported a betterer set of curtain bangs and Kim Kardashian. Her hair has changed a lot since then, but so many of us would swoon over her hair. Since the curtain bangs would be the only part you actually have to style, it also means it’s a quick fix in the morning, which can last all day with some hairspray. They can be worn with different lengths and styles. Styling Tip: Use a flat iron or curling wand to give your curtain bangs a gentle curve. Related: 15 Stunning Headband Hairstyles That Look Trendy & Stylish 8. Long Layers Long layers add movement and dimension to your hair. They’re flattering and versatile, and it’s especially useful if you have a lot of hair, as it make it easier to brush, wash and blowdry.. If you want even more depth add some highlights like balayage for a low maintenance style since you don’t have to touch the roots until like…ever! Layers can be worn with a center or side part. Styling Tip: Use a leave-in conditioner to keep long layers soft and manageable. 9. Undercut For a bold and trendy look, consider an undercut. The undercut can be as subtle or dramatic as you like, and it can be hidden when you want. This is the ideal pinch of boldness if you always keep your hair short. Why? Because if you decide to change it up, it doesn’t take as long to grow and catch up with the rest of your hair length. Fair warning though: all eyes will be on you during PTA meetings though (in the best way possible)! Styling Tip: Experiment with patterns or designs for a personalized touch. 10. Side-Swept Pixie Not all Pixies are created equal. A side-swept pixie adds a playful element to a classic cut. It’s easy to style and can be changed up for different occasions, you can add a bright color, you can add highlights, you can add texture or just wear it straight. The options are endless. It’s such an easy to maintain look that you might find yourself not changing away from this style for a long time. Styling Tip: Use a texturizing paste for a pixie, side-swept look. 11. Mohawk Chic This is definitely boldness on a whole other level. A Mohawk-inspired cut offers an edgy and confident style, and shows a side of you that tells others not to mess with this mama. Go the extra mile and ask your style on your next visit to add some fun patterns or design to the undercut part. You can keep the sides shorter for a milder look or go bold with a full Mohawk. Inside tip: curious but not fully onboard with this drastic style? French braid the sides of your hair for a “faux” mohawk so you can try it out without the cut! Styling Tip: add patterns or designs to the undercut part of the hair. 12. Tousled Waves Tousled waves add a touch of romance to your look. Whether you have a short or long haircut, you can create soft waves for a relaxed style. Tousled waves are like beach waves without the messy finish. So your hair will look more “done”, than beach style which is supposed to make me relaxed salty hair. Tousled will give you that more elegant feel, ready for a night out sans kids that you so well deserve! Styling Tip: Use a curling iron to create loose, beachy waves. 13. French Bob The French bob is a chic and timeless choice. It’s shorter in the back and longer in the front very slightly, offering a stylish and low-maintenance option. It’s also shorter than the regular bob, and so so cute. If you’re ready to experiment with shorter hair that falls along your jawline, French bob might just be what you need. Add some good old hair mousse for some texture. Styling Tip: Pair your French bob with a beret for a touch of Parisian flair. 15. Classic Long Hair Classic long hair is always in style. It’s versatile and can be dressed up or down for various occasions. There’s a reason this timeless look made this list: long hair can be transformed into so many different things, from braids, to waves, to curls, to updos, to straight, to fake mohawk. If you happen to have long hair and are not ready to cut inches away, then it’s time to get creative with your styling, and girl you got so many options! Styling Tip: Use a heat protectant spray before using styling tools. Related: 15 Ponytail Hairstyles for a Stunning Look 15. Curly bob If you have naturally curly hair and are tired of straightening it, then it’s time to embrace your roots! A curly bob will give you a break on maintenance because it’s shorter, and it can make you look youthful. There are several great products in the market today that can make your curls shine, and no heating tools are required, which would give you hair a much needed break from damaging heat! Styling Tip: Use a texturizing spray to add grip and texture to your locks Final Thoughts There you have it, 15 stylish mom haircut ideas that will help you elevate your mom style. Whether you opt for a pixie cut, a trendy bob, or playful braids, these haircut ideas offer endless possibilities for self-expression and convenience. With the right styling and care, you can embrace your new look with confidence and grace. Remember, it’s essential to choose a haircut that aligns with your personality and lifestyle, making it easier to maintain and enjoy every day.
READ MORE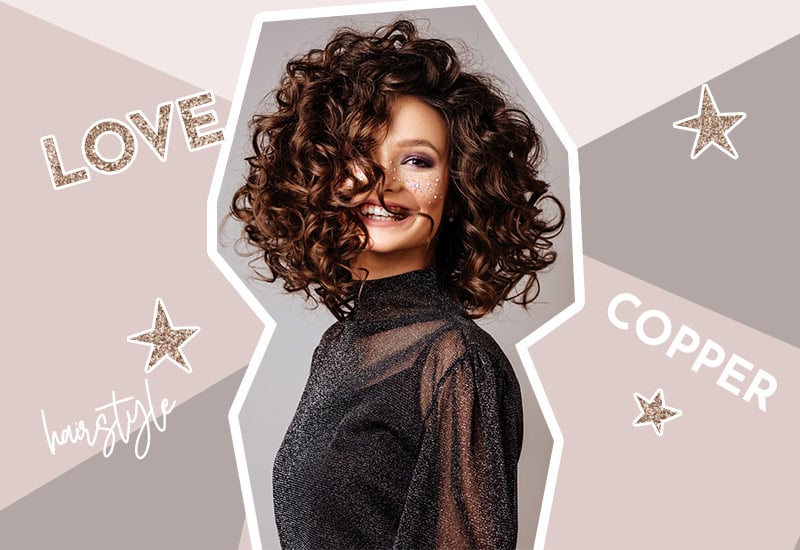
15+ Chocolate Copper Hair Trends to Get Inspired
In the realm of hair fashion, there’s an enchanting trend that’s been capturing hearts and turning heads, and it goes by the delectable name of Chocolate Copper Hair. This sumptuous and striking style is a harmonious fusion of rich chocolate brown and fiery copper, creating a luscious masterpiece that’s as tantalizing as your favorite dessert. Chocolate Copper Hair trends are like a fine blend of flavors, combining the earthy depth of dark chocolate with the fiery warmth of coppery accents. It’s a hairstyle that exudes sophistication, draws the eye with its alluring contrast, and promises to elevate your look to a whole new level of mesmerizing charm. But Chocolate Copper Hair isn’t just about the color; it’s also about the style. From the classic allure of a chocolate bob to the intense drama of fiery copper waves, we’ll explore a range of styles that embrace the delicious union of these two mesmerizing tones. In this post, we invite you to embark on a delightful journey through the world of Chocolate Copper Hair trends. We’ll delve into the tantalizing shades and captivating styles that have been setting the hair fashion scene on fire. Whether you’re drawn to the richness of deep chocolate hues, the vibrancy of fiery copper streaks, or the subtle blend of both, there’s a Chocolate Copper look to suit every personality. 15+ Chocolate Copper Hair Trends Classic Chocolate Copper Starting with a timeless choice, the classic chocolate copper hair color combines dark chocolate brown with vibrant copper highlights. This trend adds warmth and dimension to your hair, making it a versatile option suitable for various skin tones. Chocolate Copper Balayage Copper balayage is a technique that creates a gradual, natural-looking transition from dark chocolate roots to vibrant copper ends. This trend offers a low-maintenance style with a touch of elegance. This is perfect for busy mamas out there who has no time to spend hours doing your hair before getting ready for the day or for a big event. Copper Peach If you’re not sure (or sold) on turning your hair red just yet, and want to start gradually on adding more color, then Copper peach might be a perfect compromise. You will keep your lighter locks while adding some red undertones and give your hair a little “oomph”. This will give you time to get used to the new hues in your hair, giving you a chance to decide if you want to go for more red, or stay as you are. Related: 19 Hottest Hairstyles for Wet Hair You’ll Want to Try ASAP Copper Auburn Auburn accents on chocolate copper hair are an excellent choice for those who want to highlight their fiery side. These subtle hints of red or auburn create a striking contrast against the chocolate base. Copper Auburn hair complements a variety of skin tones and adds a touch of mystery to your overall appearance. Whether worn sleek and straight or in cascading waves, this dynamic color choice adds an electrifying edge to your style, leaving a lasting impression wherever you go. Copper Ombre Copper ombre is a stylish way to embrace the chocolate copper trend. This gradual color fade from dark chocolate to vibrant copper provides an eye-catching and modern look. The best part is that as your hair grow, you will not see an obvious line of color change. This gives you more time in between salon appointments, since it’s a low maintenance style! Mahogany Infusion Mahogany-infused chocolate copper hair color combines rich brown with deep red undertones, offering a sophisticated and sultry appearance that’s perfect for any season. The deep brown base, reminiscent of decadent chocolate, serves as the canvas for the infusion of mahogany hues, adding a touch of red undertones that create a striking contrast. The result is a hair color that is both sultry and refined, perfect for those seeking a luxurious and seductive look. Copper Peekaboo Highlights Hide streaks of copper beneath the top layer of chocolate hair, revealing them with different hairstyles for an element of surprise. This is an edgy twist to the blond peekaboo style with a modern and young look. This is definitely a nice style because it adds the element of surprise. No one will really see that different color there unless you hair is moving and you will suddenly hear “hey, I love the color you added there!”. Related: 15 Ponytail Hairstyles for a Stunning Look Chocolate Rooted Copper Description: Embrace your natural brown roots (or transform them with a chocolate shade), and gradually transition into a copper hue, creating a low-maintenance and stylish look. This is a great style for someone who doesn’t like to pay the salon a visit every month to redo those highlights! As they grow, you won’t really see much of a difference in the color, except that your roots will be longer (unless you have some grayish to cover). Caramel Highlights For a softer take on chocolate copper, add caramel highlights. These warm, caramel-toned streaks complement the chocolate base beautifully, providing a sun-kissed effect. If you already have natural brown hair, the highlights will give you a little bit of a summer beach feel that looks good on any season. Rose Gold Blend Rose gold is all the rage, and when blended with chocolate copper, it creates a mesmerizing effect.This look is a vibrant fusion of rich copper and the romantic allure of rose gold. This exquisite blend marries warm, coppery tones with delicate rose hues to create a hair color that’s both enchanting and sophisticated. Fiery Copper Waves If you’re looking for a bold statement, try fiery copper waves. Fiery Copper Wave hair is a bold and dynamic choice that sparks your style with an intense burst of passion and energy. This electrifying blend combines vivid copper hues with cascading waves, delivering a fierce and fiery appearance. The blazing undertones add a touch of drama, making it perfect for those who want to make a statement. Whether worn with loose, tousled waves or styled in sleek, defined curls, Fiery Copper Wave hair radiates an irresistible allure. Related: How to Style Short Hair – 15 Best Hairstyle Ideas and Tutorials Copper Accents Add small copper accents or streaks throughout your chocolate hair to create a playful and dynamic style. You still keep your base color, while adding some highlights for more depth and dimension, especially if you like to add waves to hair when styling it. It’s bold, but not too bold. It has enough brightness to get people looking, but in the best way possible! Strawberry Chocolate Copper Combining strawberry blonde with chocolate copper results in a delightful fusion. This trend adds warmth and vibrancy to your hair, making it perfect for those who love a unique twist. Some people are lucky to just be born with strawberry hues, and if you’re one those lucky people, then adding the chocolate copper accent will just be a big bonus. Copper Highlights for Short Hair Give short hair an edgy and vibrant touch with scattered copper highlights for a modern and bold appearance. Short hair doesn’t have to be bland and boring. If anything it’s much easier to style, color or do pretty much anything with it because you have less length, so take advantage of it! Short doesn’t mean boring! Chocolate Raspberry Swirl Imagine the delicious combination of chocolate and raspberry in your hair. Chocolate raspberry swirl combines deep chocolate with vibrant red undertones for a mouthwatering look. Another variation from rose gold and strawberry tones, the raspberry tone also looks great one darker hair, so a chocolate base will be a perfect match. Final Thoughts From the classic chocolate copper to the daring fiery waves, we’ve explored a range of trends that showcase the endless possibilities this color palette offers. Whether you’re looking for timeless elegance or a bold statement, chocolate copper can be tailored to suit your unique style. Chocolate Copper Hair’s beauty lies not only in its rich hues but in the stories it tells. It represents the willingness to embrace contrast and complexity, recognizing that life’s greatest pleasures often arise from blending seemingly disparate elements into a harmonious whole. Chocolate and copper can be a great example of how opposites attract! Just because two things are so different, doesn’t mean that they can’t look great together. As you embark on your hair color journey, remember that choosing chocolate copper isn’t just about changing your appearance; it’s about embracing a feeling—a feeling of confidence, allure, and warmth. So, which chocolate copper trend will you choose for your next salon visit? Whatever you decide, you’re sure to turn heads and leave a lasting impression with the enchanting and versatile world of chocolate copper hair trends. But this journey doesn’t end here. It continues every day as you style, maintain, and flaunt your hair. To ensure your mane remains as delectable as the day you first embraced it, you’ve learned the importance of quality products, proper care, and the occasional salon visit. So, whether you’re inspired by the sultry allure of chocolate or the fiery vibrancy of copper, whether you opt for a classic bob or embrace the allure of waves, remember that your hair is your canvas, and your beauty is your masterpiece.
READ MORE
11 Easy Hacks to Achieve the Perfect “No Makeup” Makeup Look
For years, YouTube influencers have taken to the social media platform to show us how to achieve some gorgeous makeup looks! However, these usually involve layers and layers of makeup like heavy undereye concealer, cut creases, and contour. While we still absolutely love these stunning looks, recent trends are all about embracing your natural beauty. The “no makeup” makeup look is just what we’ve all been waiting for. A way to use makeup to hide some of your imperfections while still looking like “I woke up like this.” However, achieving this look is easier said than done. That’s why we found the top 11 easiest hacks to help you achieve the perfect “no makeup” makeup look so you can walk out the door looking like you were born with it. 11 Easy Hacks to Achieve the Perfect “No Makeup” Makeup Look 1. Don’t Skimp On Skincare Skincare is of utmost importance for any makeup routine, and this look is no exception! Starting your makeup on a freshly cleaned and moisturized face is going to be one of the biggest keys to pulling off the “no makeup” makeup look. Start by cleansing your skin with a high-quality cleanser. We highly recommend this one because it contains vitamins and minerals that help purify your skin while maintaining its PH balance. We also recommend exfoliating your skin 2-3 times a week to remove dead skin cells contributing to splotchy and oily skin. After this step, use a towel to pat your skin dry. Be sure not to rub your face, ever! Rubbing your face with a towel causes a lot of friction and could cause your skin to lose precious collagen and even cause wrinkles. Once your face is dry, apply a light moisturizer and let it soak into your skin for 3-5 minutes. 2. Use A Skin Hydrating Primer A big part of nailing the “no makeup” makeup look is to have a dewy complexion, so you will want to skip the mattifying primers and go for a hydrating primer instead. Using a hydrating primer will plump up your skin, which is going to help give you a youthful appearance. We love this hydrating primer because it is loaded down with ingredients that are good for your skin, like coconut water and probiotic-based ingredients that brighten and smooth your skin! Apply a dime-sized amount to your skin and let it soak in for 5 minutes before applying anything else. Related: 19 Hottest Hairstyles for Wet Hair You’ll Want to Try ASAP 3. Use a Brush or Blender The next hack on our list is going to change your makeup game, no matter your routine! You may have seen this many times before, but if you haven’t tried it yet, you will basically have to achieve this look. You must NEVER rub any makeup on your face with your hands. Not only does it not look natural, but you also introduce bacteria to your face that can wreak havoc and lead to oily skin and breakouts. Instead, you will want to use a quality brush or a damp beauty blender to apply your makeup. Using these instead creates a more natural finish and is so much better for your face! Just make sure you use a brush cleaner to clean them regularly. Make sure to go light on the products, too! The whole point of this look is to look fresh and clean, so start minimally and build only as absolutely necessary. 4. Skip the Contour I know, I know! This sounds terrifying! However, it is best to shy away from heavy methods such as contouring, even if you’re a pro! You can use a bit of concealer in areas such as the corners of your eyes, the sides of your nose, and the corners of your mouth to give your face a more natural-looking lift. We love this concealer because it isn’t a heavy formula and is super blendable while being long-lasting. You can also add a bit of shimmery bronzer to your cheekbones for a bit of color and to give you a more natural-looking glow. 5. Use an Illuminator Remember, the key to the “no makeup” makeup look is to go for a radiant appearance. This is where an illuminator comes in. It provides a youthful, radiant glow and a bit of color to really complement your complexion. We highly recommend this illuminator to give you the perfect amount of illumination! Even celebs like Khloe K are raving about it. If you find it gives you too much illumination or if your skin has a lot of texture, you can mix it in with your primer or moisturizer to settle it down a bit. Related: Order to Apply Face Products – All You Need to Know 6. Go For a BB or CC cream We recommend ditching your foundation for this look and keeping things on the lighter side with a BB or CC cream. These creams are meant to provide light coverage and even out your skin tone without looking like you are wearing makeup! Which one you need will depend on how much coverage you need. A BB cream is great for simply evening out your complexion and providing a bit of color, while CC cream offers a bit more coverage. If you don’t have many skin blemishes, then we recommend this BB cream! If you need a little more coverage, this CC cream is the way to go! They are both highly rated and work with different skin types. 7. Don’t Use Powder If you want to look like you aren’t wearing any makeup, you will need to go sans powder! Powders mattify the skin, and they are prone to looking cakey, which is the opposite of what you are going for with this look. Remember, we’re dewy and glowy, not matte and cakey. Instead of your usual powder, opt for a setting spray. There are many different setting sprays that do excellent, but for this “no makeup” makeup look, we recommend this one! It leaves you with a dewy finish and keeps your makeup in place for up to 12 hours! 8. Use a Lip and Cheek Tint If you have never used a lip and cheek tint before, you may have just found your next fave beauty product! We love these tints because they look so natural and are two-purpose! Win-Win! They only leave a tint, so there’s no residue on our lips or your cheeks. Just pick a color that matches your skin tone so it doesn’t look like you are wearing anything. Think light peaches and pinks. We highly recommend this lip and cheek tint for this look! Here is a quick video tutorial showing you how to use this amazing product! 9. Avoid Cakey Mascara We recommend getting a lash tint and lift instead of using mascara. This will lift your eyelashes and add color, so you can literally have fab lashes right when you roll out of bed. However, if that’s out of the question, we recommend this mascara because the formula is lightweight, and it has collagen to help condition your lashes. First, curl your lashes with an eyelash curler to give them a lifted look. If your eyelashes don’t curl easily, you can warm it up with a blow dryer first. Just make sure you let it cool down first, so you don’t burn the sensitive skin on your eyelids. You should also aim to have a light hand when you are applying mascara. To do this, hold the mascara wand at the base and lightly brush your lashes upward, slightly away from your lash base, instead of trying to grab all of your lashes in the brush at the base. This will allow you to achieve a wispy, fanned look instead of a chunky mess. 10. Keep Your Eyeshadow Light When it comes to your eye makeup, you want to keep it as low-key as possible! This means absolutely no winged liner! Actually, you won’t want to use any liner at all. Go for a shimmery eyeshadow stick, or use a brush to sweep your lid with a shimmery bronzer gently! Or, you can use a cheek and lip tint on your eyelids as well to match everything else. If you absolutely must use eyeshadow, go for taupes on your eyelids and a medium brown on the outer corners of your eyes. We love this eyeshadow palette for natural eyeshadow looks! 11. Go For Natural Brows While voluptuous brows are all the rage, and if you are lacking in the brow department, you may be tempted to fill them to the max! However, going too overboard with your eyebrows will draw attention away from your natural features and won’t blend in with the rest of your natural-looking makeup appearance. To really finish off this “no makeup” makeup look, all you need to do is brush up your brows into a natural-looking position. Use a little bit of clear brow gel to add some definition and set them into place. If you have a lot of sparsity, you can fill them in gently using a brow powder as close to the shade of your natural brow as you can get. Make sure you go light, just enough to fill in gaps. When you’ve finished filling them, go back through and blend out the powder with a spoolie, then brush your brows back up.
READ MORE
15 Stunning Headband Hairstyles That Look Trendy & Stylish
Headbands were super trendy back in the days of Lauren Conrad rocking her headbands on the Hills and Queen B Waldorf always accessorizing with a different style headband in almost every episode of Gossip Girl. However, the super popular style seemed to just fizzle out until now! Headbands are a great way to accessorize your look, and there are so many different options to choose from. From dressed up and bejeweled to laid back and cas, there is a headband hairstyle to fit every style! If you want to start rocking headbands but need some inspiration, check out this list of the 15 trendiest headband hairstyles so you can rock your headband in style. 15 Stunning Headband Hairstyles That Look Trendy & Stylish 1. Animal Prints With a Low Messy Bun We love a gorgeous animal print headband! This style is perfect because it can be dressed up or dressed down depending on your mood or occasion. Just pull your hair into a low, messy bun and accessorize it with a cute, animal print headband, leaving some face-framing strands out around your face. This style is perfect for autumn and would look adorable with an oversized sweatshirt and leggings! 2. Polka Dot Headband With a Messy Top Knot This hairstyle is laid back and casual while still maintaining a little bit of a romantic vibe! We think it would be perfect for a date night paired with an off-the-shoulder blouse and a pair of cute heels! To achieve this look, you will start by putting your hair in a messy top knot or bun. Then tie your polka dot headscarf around your head like a headband and tie it at the nape of your neck! You can also turn a sheer or silk polka dot hair scarf into a headband! If you aren’t sure how to do this, check out this tutorial on how to turn a headscarf into a headband. This video has a few different ways to fold your scarf on it, but you can fast-forward the video to 3:45 to see how to achieve this specific look! 3. Basic Fabric Headband With Braids Laid back and casual, and super easy to put together! You will want to start with straight hair if you want to match this look exactly. If straight hair isn’t your thing, feel free to curl it or crimp it, or use a deep waver hair tool to create some gorgeous waves to add some dimension! Here is a short video showing you exactly how to rock this style! 4. Beautiful Chunky Braided Headband Chunky Braided Headband - carlotta.romeo Facebook Pinterest Perfect chunky braided headband, Photo credit @carlotta.romeo Chunky braided headbands are so hot right now! We love how romantic this look is, pairing the chunky headband with a loose natural hairstyle. You can find these chunky braided headbands in so many different colors so you can match your wardrobe. Here is another stunning look with this chunky braided headband with a low, messy bun we really love: This is the perfect hairstyle to rock with a turtleneck and trenchcoat during the winter when the weather is cool, just like the photo! You can also style this during the warmer months with a form-fitting bodysuit and a pair of high-rise bell bottoms. Related: 15 Gorgeous French Twist Hairstyles For All Hair Lengths 5. Mustard Yellow Headband With Wavy Hair This is one of our favorite headband hairstyles! Mustard yellow is so in right now! Pair a wide mustard yellow knotted hairband with some voluptuous waves! Start by rubbing some volumizing mousse through your damp hair and blow dry like usual. Next, spray some volumizing spray into your dry hair and curl it using a curling wand. Run a hair pick through your curls to separate them and create that gorgeous, wavy look. Now, just accessorize with your headband, and you are good to go! If you don’t have enough volume, try teasing your hair at your crown with a teasing brush. 6. Pink & Satin With Wavy Hair If mustard yellow isn’t your thing, or you are searching for something with a more elegant feel, then the pink & satin headband with wavy hair. It is definitely worth trying. This hairstyle is so chic you will want to wear it all the time! There is just something about pink and satin that is just so posh! This look also doesn’t have as much tousled volume as the previous one, so just a bit of protecting serum should do the trick! You can also rock this look with straight locks! Just remember to leave a few face-framing pieces around your face to create an ultra-flattering style. 7. Velvet Headband With a Low Ponytail Velvet is making a huge comeback and has been increasing in popularity over the last few years. Velvet shirts, velvet jumpsuits, velvet pants, and velvet headbands! Just like satin headbands, velvet headbands have a super elegant vibe that can take any look to the next level! For this look, start with wavy hair and pull it back into a low pony with a clear elastic band. You don’t want to use a headband with color because it will steal the spotlight from your gorgeous headband. If you want to style a blush pink headband like in the picture, you can find it here! But we think any color velvet headband will look stunning. 8. Vintage Pin-Up Bandana Headband With a Ponytail This headband hairstyle has all the vintage pin-up feels, and we’re here for it! The key to this look is the pouf in front. Make sure you have plenty of bobby pins and hairspray! Here is a step-by-step tutorial showing you how to achieve this look! We recommend pairing this look with a cute leather jacket and some heels that match your headband. 9. Pearl Embellished Headband With Slicked-Back Hair We think this is one of the most adorable headband hairstyles! The pearl embellishment on this headband gives it a romantic feel. To achieve this look, part your hair right down the middle. We recommend using some shine serum to eliminate flyaways so you can keep the front of your hair sleek. Just use your headband to pull all of your hair back out of your face. You don’t want any face-framing pieces with this look because this hairstyle is all about elegance. Related: 15 Ponytail Hairstyles for a Stunning Look 10. Two-Toned Headband With Braids This headband hairstyle is super casual but super adorable! Start with French braids on both sides of your hair. Then, layer on a two-toned headband of your choice! It can be as bold and funky as you want. If you need to learn how to french braid your hair, here is a quick video tutorial! We think this hairstyle would look so cute with a crop top and blue jean cutoff overalls, which are totally trendy right now. 11. Scrunchy Fabric Headband With a Messy Half-Up Ponytail We love the messy and undone vibe of this hairstyle! It’s super versatile, and these headbands are available in so many colors! You will want to find an extra wide headband made with a stretchy material. Start by spraying some volumizing spray in your hair. Pull up large sections on top and tease them with a teasing brush. Pull your hair back with your headband, then proceed to gather half of your hair up into a loose, messy pony! 12. Bejeweled Headband With a Low Ponytail Just like the song from our girl Taylor’s last album, you will make the whole place shimmer with this hairstyle. We think you can bejewel anything, and it will almost always be brilliant! Just like this gorgeous headband! To achieve this look, Just pull your hair into a low pony and put on your headband. That is it! That is all you need to do to rock this look. The secret is finding the perfect jeweled headband. We love this one, or you can make your own! Related: 10 Easy Steps to Achieve the Perfect Feathered Brows 13. Gold Double Rope Headband With a Hair Tuck This hairstyle is so romantic and elegant, perfect for a date or a fancy dinner! The best part is that it is so easy to put together! You can sleek it back with your headband for a chic look or leave some strands loose around your face to keep it a bit more on the casual side. Here is a quick tutorial showing you how to achieve this look! We think this hairstyle would look beautiful with a cute, chunky knit sweater paired with a leather or plaid miniskirt. 14. Pearl Handband With Curls We love headband hairstyles with pearls, and these chunky pearls have got us swooning! This look is oh-so-elegant and feminine. Just start by spraying some heat-protecting spray in your hair and curling it with a 2-inch barrel curling iron. Secure an oversized pearl headband 1-2 inches back from the front of your head, leaving hair in front. Pair with some simple earrings so you don’t take away from the headband. 15. Rhinestone Headband With a Low-Side Bun If you are a bit boujee and are looking to make a big statement, this hairstyle is it! The other headband hairstyles don’t hold a candle to this stunning rhinestone-studded headband with a glamorous, low, messy side bun! You will want to style your hair in a low, messy bun first. Here is a video tutorial if you don’t know how to style your hair like this. Now, just secure your headband in place, and you are ready to go!
READ MORE